Banksia Yoga
  • Welcome
  • Class Times
  • Events
  • About
  • Blog

Beat the winter chill - practice in bed!

6/8/2015

1 Comment

 
Picture
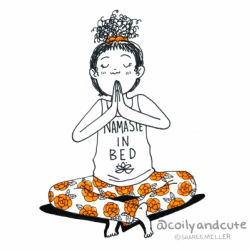
Love this pic - used with permission, click imagefor links to more great atwork
Sometimes, it’s just too cold to get out of bed early enough to do yoga on these dark winter mornings – so I cheat, and do some yoga poses in bed instead. I have chosen some of my favourite simple but effective poses to share here which stimulate the fire centre in the navel to warm the body and reduce sluggishness- that can all be done under warm covers! (Provided your bed is firm enough and you have space to spread out a bit).  They can of course also be done on a yoga mat on the floor.

The following sequence can be done either at night before going to bed, perhaps following on with lying flat in corpse pose (savasana) counting the breath backwards from 12 before going to sleep - or you might like to try it in the morning before you get up- follow it with a warming drink of fresh grated ginger and lemon juice in hot water. Make the practice fit your available time, if you only have 10 minutes, spend a couple of minutes on each pose, if you have longer, take your time and enjoy.

As usual, any time you practice yoga, it is about connecting your body, mind and breath- only do poses that feel right to you in that moment, and only to your comfort level.

1.        Easy Rest position.  Place the soles of your feet on the bed hip width apart.  The feet need to be a comfortable distance from the body so that the legs stack against each other like you are making a house of cards.  Remove your pillow, but ensure that the chin is tucked in and the back of the neck long.  This pose invites the psoas muscles to release, the diaphragm to move easily and restores calmness to the central nervous system.   This is a being pose.  There is nothing to do but breathe- through the nose, slowly and smoothly.  You can stay here for as little or as long as you like, 10-15 minutes if you have time, or 1-2 if you don’t. Bring your mind back to the breath any time you notice that it has moved away.

2.       Spinal arch and flatten.  As you stay and breathe in easy rest pose, you may notice that the body wants to start rocking rhythmically with the breath.  As you inhale, the pelvis may rock forward, allowing the lower back to further lift away from the bed (the bottom stays down).  As you smoothly exhale, your lower back will return back to the original position.  You can join in by deliberately contracting the muscles that run along the spine with every inhale as you lift, and encourage these muscles to release with every slow exhale as you return.  Tightness in these muscles often contribute to lower back pain. About 5-8 rounds is ideal.

3.       Supported Revolved Belly pose.  Hug your knees into your chest.  As you exhale, allow the bent legs to roll to the right, as you bring the left arm out to the side at shoulder height.  Rest your knees on one or two pillows for support, and keep the shoulders relaxed on the bed.  Your right arm can rest on your knees if you like, and your head might like to turn to the left.   Rest here and breathe into your belly.  Repeat on the other side after a minute or so, taking care to lift the top leg, and then the bottom leg to roll over.  This pose will massage and squeeze internal organs, great for our digestive system and lower back.

4.       Happy Baby pose.  This may get tricky to do under the covers, but is great pose to explore.  Bring your knees over your chest and then out to the sides of your body with your feet pointing up.  Grab hold of your toes, ankles or shins and roll from side to side.  If doing this in the evening, you might like to be quiet and calm here, but if practising in the mornings, you might like to explore opening and moving the limbs and joint-. wriggling the toes; rolling the ankles; opening and closing the knee; rolling wrists; opening elbows; straightening arms etc.  I also like to add in massage to the face, arms,armpits, hand,s legs and feet here to get the lymph moving to improve immune function.  Be like a newborn baby in her cot, taking delight that she has limbs and that they move in wonderful ways!

5.       Reclining bound angle pose.  Come to lie on your back (again with no pillow) and bring the soles of the feet together and allow the knees to fall out to each side.   If you like, put a pillow under each knee to support the legs as they open.  This is one of the most powerful positions for regulating women’s hormones as blood is directed into the pelvis, and it is also good for the prostrate in males.  Stay here and breathe for as long as you remain comfortable, allowing gravity to gently open the hips.  Finish by hugging the knees into the chest, and then extend them long into savasana if staying in bed to sleep, or rolling to the side if you are ready to get out and face the cold winter’s day!

1 Comment

Tending the inner flame

22/6/2014

0 Comments

 
Fire is essential for fueling everything from our digestion to our dreams.  A well-tended inner fire sustains our vitality and our passion, to give our dreams flight.  However modern life often takes all the fuel we have to just get through the day, so there is just not enough left for the bigger things; like dreams- in some cases the flame feels like it has even gone out.  Our language even reflects this lack of fire – Burn out.  This particularly affects those who are in caring relationships for others, and I include yoga teachers, and mothers in this.

Today is the winter solstice.  This is the time when we have the least amount of sun- our major cosmic source of fuel in our lives- it grows the plants that we eat and gives us warmth and beauty.  At this time of year, the darkness can seem overwhelming, cold and ongoing.  By honouring the natural cycles of the Earth we are reminded that everything changes.  That we need darkness and light, and that the light will return.  We can use the Winter Solstice as a reminder of these cycles, to connect with the Earth, to connect with the sun and to refuel our inner flame.

Candle making is a form of meditation for me, and I love making my own for use in my yoga classes and to give to friends. Candles can also be used to remind us of our intentions.  Try this meditation before making your own candle, and then continue the meditation while making the candle and every time you light your candle you will be instantly reconnected to your inner flame..

Inner Flame Meditation

Come to stand or sit in a comfortable position for the body.  

Notice what holds you up, what supports you.  Feel connected to the Earth underneath you.  Allow the spine to be in neutral with the head connected to the spine, collar bones and belly open at the front of the body. 

Feel the breath come in through the nostrils.  Allow each inhale to travel all the way down to your solar plexus, above the navel.  As you exhale gently notice the belly drawing in and feel the warmth of the exhale as it leaves through the nostrils. Notice how your inner fire warms the breath.

After a few rounds of breath awareness, let your attention gently settle at the solar plexus.  Connect to what fuels you, what nourishes you, what supports you.  

Then consider what is it that you would like to invite to burn more brightly in your life over the next cycle of the earth around the sun?  Perhaps there is an image, smell, word or feeling.  It can be specific or vague.  Perhaps you can allow it to settle in the body as an intention, a sankalpa.  Remember these are affirmations always expressed in positive language and acknowledging that you already have all that you need to burn brightly- it’s a remembering, a refuelling if you like.  

Come out of this meditation, by gently returning your awareness to your body and the earth and allowing the eyes to blink open.  As you do-keep this awareness of your intention, and as you create your candle, allow the intention to pour into the candle, so that any time you need to re-remember, your candle will light the way.


Picturemy handmade winter solstice candle


How to make soy candles

Chose your container.  I like to use wine glasses or even old jam jars. (great up-cycling use of excess glasses) Decorate it if you want with glass paint.

Chose an appropriate wick size for your container.  Place wick in bottom and adhere with glue or blue tak. You can get wicks that are already attached to a holder, or you can thread your own wick through a matching size holder and keep it upright with pegs.  

Melt soy wax in microwave or double boiler.  It's best if you use an old jug for this, then it's really easy to pour once melted.  You need approximately double the amount of unmelted wax to your container size.  If you want to colour the wax, grate colour pigment, or an old crayon before melting;

Once melted add scent and stir.  I prefer essential oils and find that lemon grass works well. 

Pour wax carefully into container, keeping wick centred.  Use this step as a meditation in itself.  Be aware of your own posture as you pour, and also be aware of pouring your intention from your inner flame meditation into the candle.

Leave in dark place for 2 weeks.  This will increase scent and to allow the wax to properly set before use.  

Trim wick before use and enjoy.  If there are any bubbles or cracks on the top, you can smooth them out with a hair dryer.  Burn your candle for long enough for the wax to melt completely to the sides of the glass.

I use Nature Wax C-3 1000% soy wax.  This is the information provided for this product:  "It is formulated to have better glass adhesion than other soy waxes and superior colour vibrancy. Soy Wax Candles burn cleaner, cooler, up to 50% longer and produce less soot than other Waxes. Soy Wax is Vegetable based making them Vegan friendly. Candles made from Soy Wax produce a natural fragrance and are 100% non-toxic." http://www.amcsupplies.com.au

“my mission in life is to not merely to survive, but to thrive, and to do so with some passion, some compassion, some humour and some style” 
Maya Angelou

0 Comments
Powered by Create your own unique website with customizable templates.
Photos used under Creative Commons from laszlo-photo, Artotem, bandita, Celestine Chua, AlicePopkorn
  • Welcome
  • Class Times
  • Events
  • About
  • Blog